Replacing Pi-hole with NextDNS
January 23, 2021: I’ve posted an update to this guide, outlining some of the new performance related features and a brief guide to installing NextDNS on an Unifi Dream Machine Pro.
I've run Pi-hole on and off for years. Whole home ad blocking, privacy, and security is nearly a requirement in today's "smart home" landscape. With each TV and tablet capable of sending a plethora of data back to their respective motherships, ensuring you're protecting your information (and bandwidth) is a cornerstone of home networking.
Historically, the easiest way to accomplish this was Pi-hole. Pi-hole acts as a local DNS cache and proxy, with a nice UI and some light analytics sprinkled in. It runs well on a Raspberry Pi, and gives you a number of options to customize the DNS resolver, select protocols, and even act as a DHCP server if required.
Over the years, I've noticed that the Pi-hole gets slow after a few months of concurrent use. If you're not regularly flushing the logs and rebooting, you'll find queries take just a bit longer to resolve and the benefits of a local cache are gone. Pi-hole also doesn't currently support the latest in encrypted DNS resolution with upstream resolvers, such as DNS-over-HTTP and DNS-over-TLS (there is a workaround). For these reasons, when I heard about NextDNS, I decided to take a look.
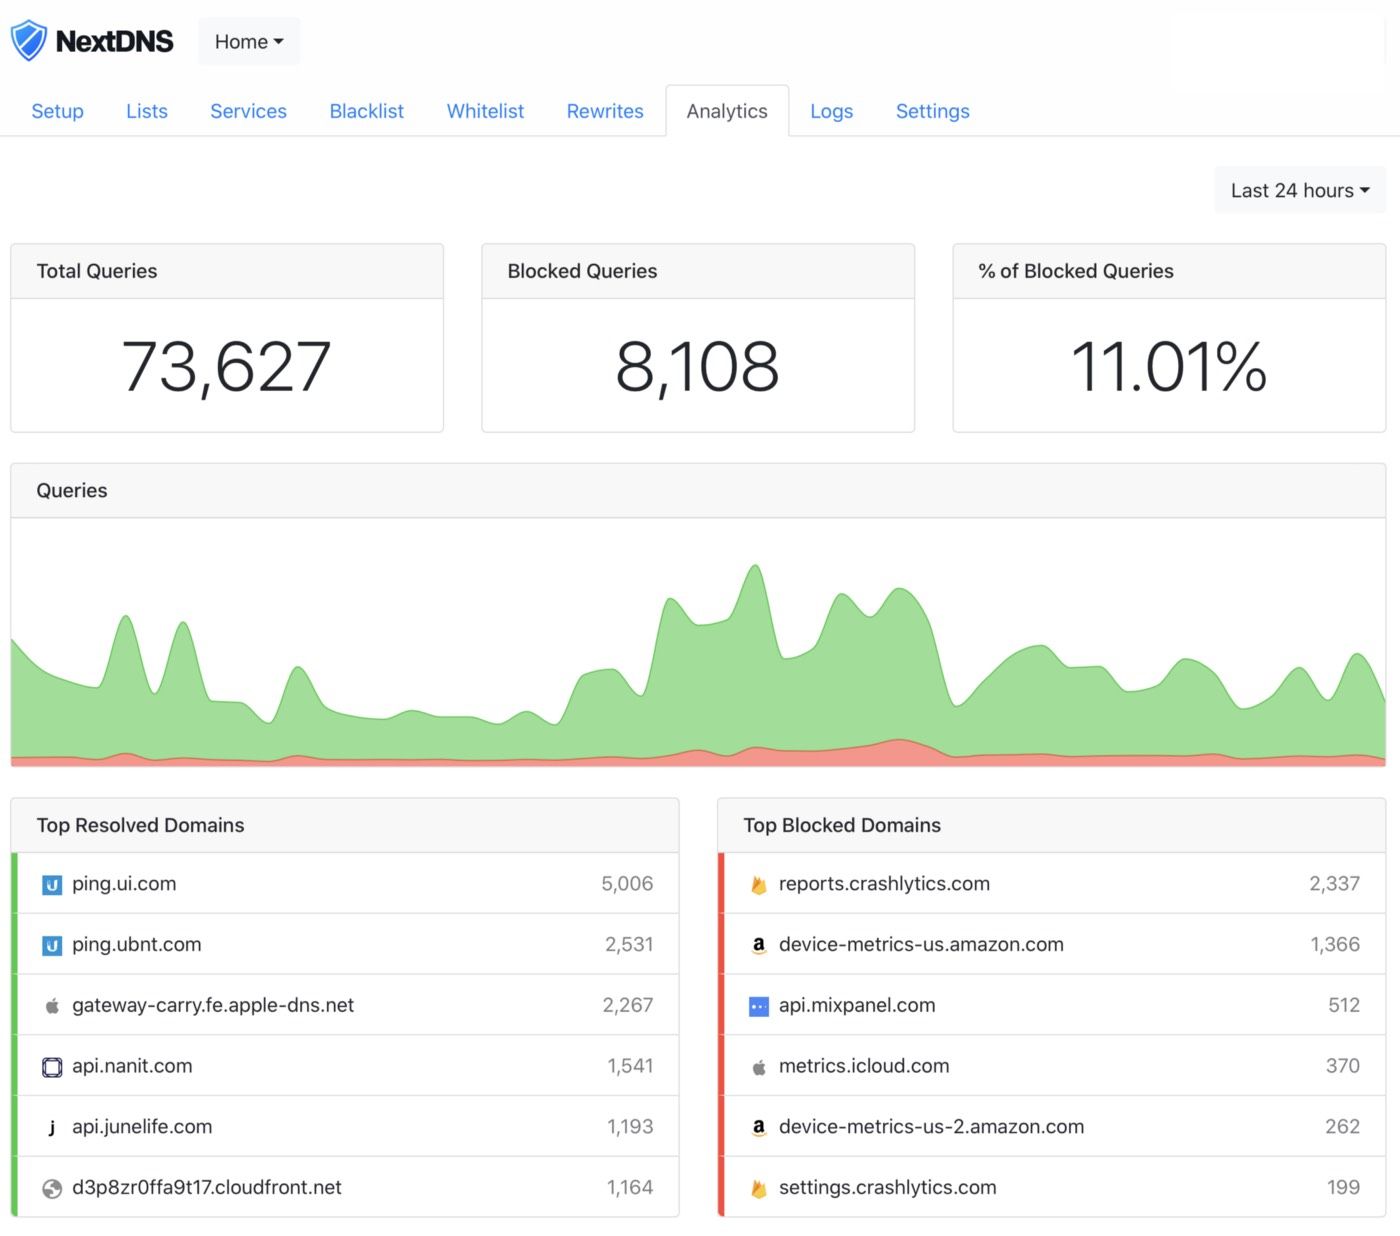
NextDNS is a managed DNS resolution service that boasts ad blocking, tracker blocking, security blacklists, and other privacy and security focused configurations all delivered over DNS-over-HTTPS or DNS-over-TLS (traditional IP-based resolution is available as well). It also has nice mobile apps that can leverage your existing configuration to ensure a seamless ad blocking, privacy-focused browsing experience at home and abroad.
The primary challenge to face when configuring DNS-over-HTTPS or DNS-over-TLS is the lack of support for these new standards in modern networking gear. I run what could probably be considered one of the most robust home networks out there, backed by Ubiquiti's Unifi devices, and I'm still unable to leverage this secure approach to DNS resolution natively.
Luckily, NextDNS released a CLI client that can be installed on just about any Linux distribution, and act as a proxy accepting traditional DNS request over port 53 and performing the upstream resolution using DNS-over-HTTPS. This is where things get interesting if you're looking to replace that Pi-hole instances.
Getting Started with NextDNS on Raspberry Pi
The following is a guide to creating a Raspberry Pi based NextDNS proxy (this method can be used for CloudFlare's 1.1.1.1 as well).
1. Setting up the Pi
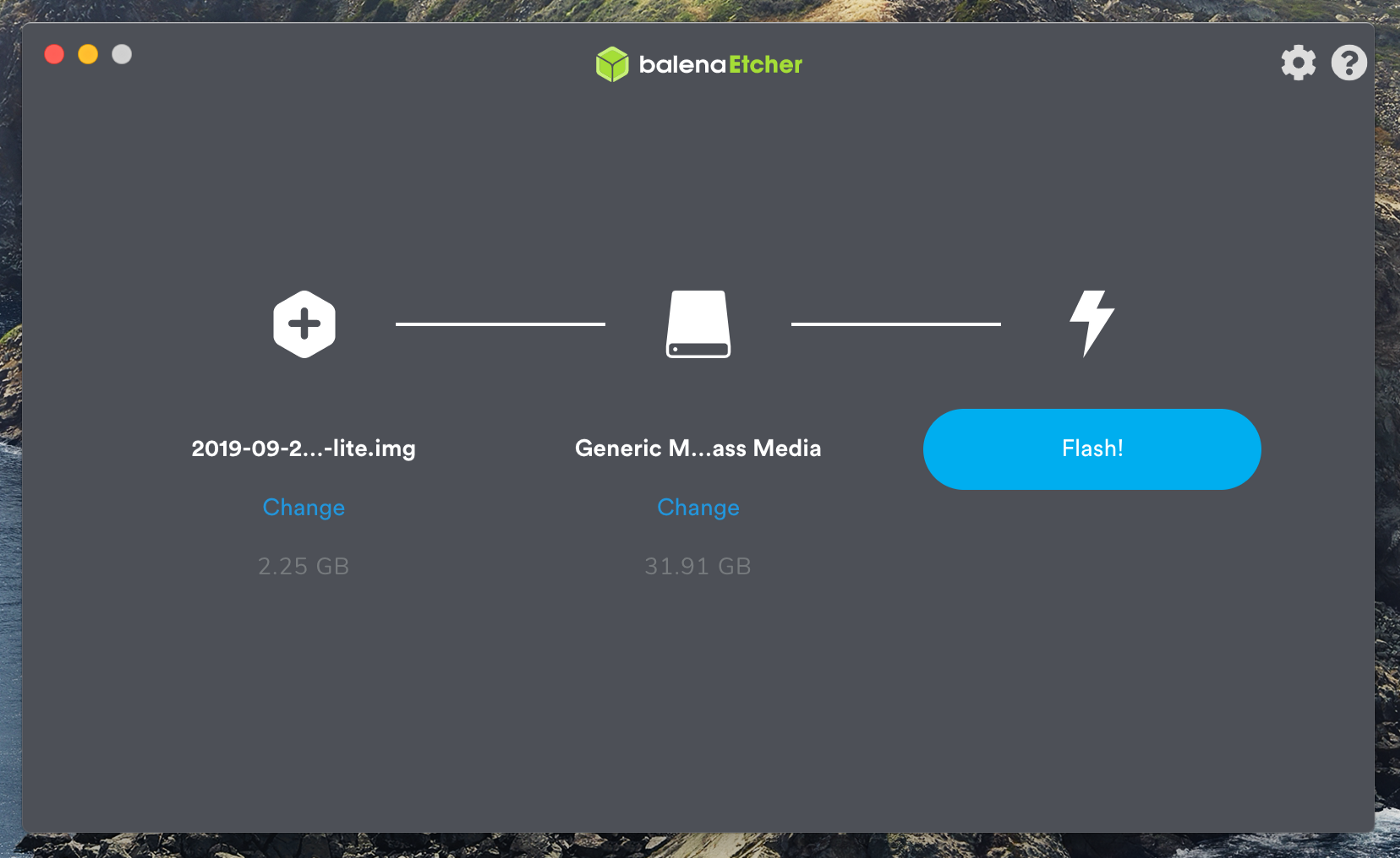
This starts like many other Raspberry Pi tutorials. The first step is to flash the Pi with the latest server OS. I generally go with Raspbian Lite, but you can select the Linux flavor of your choice.
I'm on a Mac, and use Etcher to flash my Pi's SD card with the OS.
When done flashing, don't forget to add the ssh file to the root of the SD card/volume. This will ensure we can connect to the Pi without hooking up a monitor, keyboard, and mouse.
To SSH into the Pi, simple open a new terminal session and connect by running ssh pi@raspberry. The default password is raspberry. Please change it!
After connecting in, update the OS using sudo apt-get update and sudo apt-get upgrade.
Next, we'll need to set up a static IP. The approach I generally take is to run ifconfig and copy out the IPv4 and IPv6 information on eth0. I then edit the DHCP config by opening sudo nano /etc/dhcpcd.conf.
Look for the section that starts with "#Example static IP configuration:" and uncomment out the lines, replacing the examples with your info. My config looks something like this:
#Example static IP configuration:
interface eth0
static ip_address=10.0.0.6/24
static ip6_address=2601:280:4781:6670::5a7/128
static routers=10.0.0.1
static domain_name_servers=127.0.0.1
Reboot the Pi to continue (sudo shutdown -r now). When you SSH back in, you'll need to use the new static IP address.
2. Installing NextDNS CLI
Installation is straightforward. You simply need to add the repo and install.
wget -qO - https://nextdns.io/repo.gpg | sudo apt-key add - echo "deb https://nextdns.io/repo/deb stable main" | sudo tee etc/apt/sources.list.d/nextdns.list sudo apt install apt-transport-https # only necessary on Debiansudo apt update sudo apt install nextdnsMore information on the installation and configuration process can be found on the GitHub page of the CLI.
3. Configure NextDNS CLI
I've included a few configurations with this install command. First, I'm allowing the client to listen on all interfaces. If you don't adjust this, by default, it will only listen on localhost and won't be accessible to others.
Next I configure client reporting, so the analytics portal includes devices. If you're concerned about logging and privacy, you'll want to disable this. We're also automatically activating the NextDNS daemon on startup. The config parameter ties the custom config ID associated with your NextDNS configuration with the CLI. This ensures the changes made in the web interface will be respected by the CLI (i.e. adding block lists) as well as logging and analytics configurations.
The last line of the config will setup a local forwarder for my private network, which is handled by the DHCP server on my router.
sudo nextdns install \ -listen :53 \ -report-client-info \ -auto-activate \ -config abc123 \ -forwarder my.home=10.0.0.1To check the config, you can take a look at /etc/nextdns.conf.
Finally, to turn NextDNS on, simply run: sudo nextdns activate. You can check the status by running sudo nextdns status. You've now setup a DNS-over-HTTPS proxy that can accept requests on your local network. You can test this from your local terminal by running nslookup google.com 10.0.0.6 (replace the IP with the IP of your new Raspberry Pi DNS proxy).
4. Adjust Your Router
The final step is to adjust your routers settings. This means replacing the DNS server settings on the router with the new Pi NextDNS proxy static IP address. Each router is different, so consult your router's user guide to find the correct approach.
Final Thoughts
NextDNS is still in its early stages, and they intend to charge $1.99/month for unlimited DNS queries at a later date. They also don't have locations in most US metros as of this writing; while I live in Denver, my queries are being served from Dallas, adding tens of milliseconds of latency compared to other providers.
Finally, with security and privacy top of mind, it's a leap of faith to send this amount of data to a managed service with a short track record. Keeping this in mind, the local and server-side controls NextDNS provides, such as not keeping logs nor sending device information, coupled with the recent Mozilla and NextDNS partnership announcement gives me confidence in moving forward with the service and this setup.
I hope this guide was useful for you! If you have any recommendations for adjustments or simplifications, please reach out @MikeLapidakis.


Comments ()