Lightroom CC + Fujifilm XT-2: A New Amateur Workflow

When it comes to photography, I fall squarely in the amateur class. I have good gear and enjoy the craft, but I’ve never been paid for my work, nor do I aspire to be. I devote a sliver of my week to learning new techniques and tools. I’m historically a fan of Adobe Lightroom and all the power that it gives amateurs like me to correct an exposure miscalibration, but I also find value in more consumer focused services such as Apple Photos and Google Photos.
In October 2017, Adobe released a new, cloud focused Lightroom (confusingly dubbed Lightroom CC, and renaming the original desktop Lightroom product to Lightroom Classic CC). From the initial announcement, it sounded like the perfect solution to every amateur photogs workflow dilemma, with a streamlined desktop/mobile/web experience that looked to address every gripe I held with the old (classic) application’s workflow.
In practice, Adobe’s new Lightroom is barely more than a beta, stripping much of the depth and capability from the original, and surfacing only the most popular, fundamental capabilities. They’ve promised rapid feature parity, and three months later have delivered some of those missing features (tone curves!), but there are still massive holes left in my workflow where Classic’s capabilities once rained.
I’ve struggled with this new workflow for a few months now. I primarily shoot RAW + JPEG on my Fujifilm XT-2. Lightroom CC’s revamped import screen, devoid of any options, makes importing only RAW or JPEG impossible. There isn’t JPEG sidecar support with RAW photos, cluttering up the entire experience, and the new catalog screen doesn’t display the RAW badge over photos, requiring you to expand the information panel and click on each photo to see what format it was shot and stored in. This makes for one frustrating catalog organization and development experience.
Taking a step back from Adobe’s vision for Lightroom CC, it’s positioned in a challenging, cluttered market for amateurs. Google and Apple have both released wonderful, fully integrated solutions to your mobile photography workflow, and they cost much less (free?) than Lightroom. They can edit photos, and have a level of smarts to help group and organize your collection. With Lightroom moving more toward consumers and amateurs, what is the value proposition of paying for even more cloud storage, and getting a half-baked product?
As it turns out, Lightroom is still king of the RAW photo development process, and the other two services aren’t looking to add that capability any time soon. With this calcification made, I think I’ve solved the Lightroom CC workflow dilemma, and solidified its place in my amateur workflow in the process.
The Workflow
The first thing I set out to do was give each service a job. Apple Photos, the one service I’ve used consistently for years, will be used for JPEGs. When shooting RAW + JPEG, the processed images will eventually end up in the Photos app on my Mac. Google Photos will take in from there, backing up the processed images a second time to their service. Google Photos is fantastic for photo books, and the Assistant feature is unprecedented. It’s also a great service for sharing photos, since it’s cross-platform.
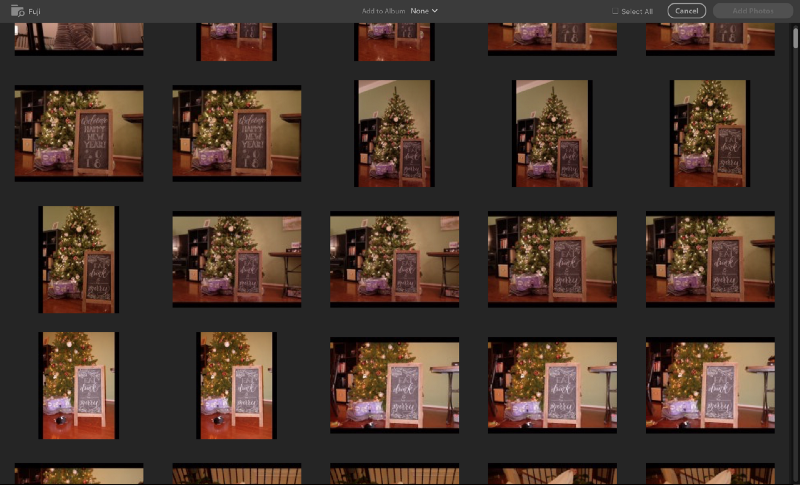
Lightroom CC is the home to unprocessed, RAW images. Rather than importing both the RAWs and JPEGs into Adobe’s cloud solution, I’m sticking with importing only the RAW photos. This gives me the opportunity to focus on only those images that I can manipulate the most, and reduces the storage used by the images I capture (no need to back up JPEGs a third time and never use them). When an image has been processed, I export it into Apple Photos which then backs up to Google Photos.
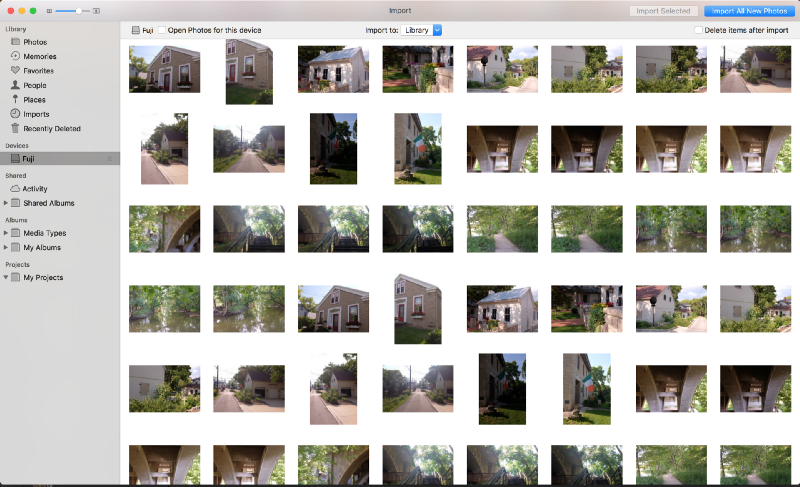
The challenge with this workflow, importing JPEGs into Apple Photos and RAW photos into Lightroom CC, is filtering the images on the SD card out of the camera before the import. Neither program gives you the opportunity to filter by file type, meaning this must be done from the file system, adding a cumbersome middle step to the process.
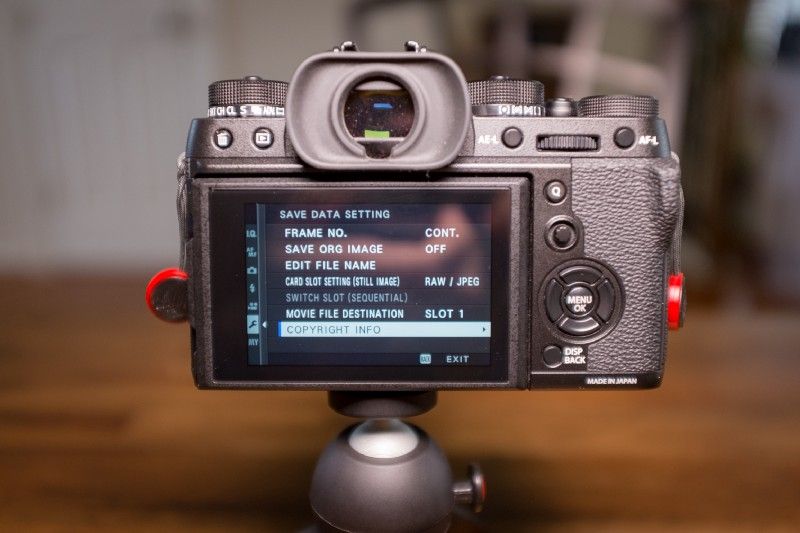
Here’s the kicker, though; the Fuji XT-2 has two SD card slots, one for primary and one for backup. In the settings, the camera can be configured to send RAWs to the first card slot, and JPEGs to the second. When I go to import the images, I know the first SD card should be imported into Lightroom CC, and the second SD card should be imported into Apple Photos. The whole process is bifurcated and streamlined, with a card dedicated to the two image manipulation and organization programs I use most.
This tiny revelation has clarified the application's purpose in my workflow, reduced redundant cloud storage costs, and sped up the import and organization process tremendously. No more goofy sorts and filters in Finder to figure out which photos should be sent to which application.
So, until Adobe adds some basic filtering and sorting to their import dialog in Lightroom CC, this split-card approach is the best solution I’ve come up with for managing both RAW and JPEG images. Unfortunately, most cameras only have a single SD card, so mileage may vary when adjusting your workflow.


Comments ()