Securing Home Assistant with Cloudflare Zero Trust

The rise of the smart home, and the endless closed platforms that came with it, has excited and frustrated tinkers for over a decade. The launched of Home Assistant, an open-source management and automation platform for smart home enthusiasts, was a considerable win for those looking to break down the silos between these products.
Home Assistant is an open-source platform that runs on your local network, capable of acting as a bridge between thousands of smart home products. The web app enables endless customization, visualization, and automation. The centralization of these platforms on a server running in your home brings with it a risk – how do you secure the application while maintaining remote access, required for automation and control?
The developers of Home Assistant created a bridge for external access, called Nabu Casa. This subscription service is integrated directly into Home Assistant and provided subscribers with a unique URL and cloud hosted proxy to enable external access without opening ports on a home network. This is a fantastic solution, and a great way to support the developers, with one minor warning; a vulnerability in the Home Assistant login page, a distributed denial of service attack, or a sophisticated brute force attack, could result in a complete compromise of your smart home (shadow garage door opening, anyone).
I set out to provide remote access while:
- Ensuring easy configuration and access by my family.
- Enabling the ability to block countries (i.e., Russia, China, etc.).
- Providing a web application firewall (WAF) with basic attack protections.
- Leveraging VPN as a last resort, as VPNs on mobile devices can create connectivity, speed, and functionality challenges.
- Eliminate open ports on my local network and the exposure of my network's public IP address.
- Provide a valid SSL certificates while accessing the dashboard from outside the home.
The Possible Solutions
I tested three solutions to address this security challenge. The first option tested was the cloud access provided by Nabu Casa. This works seamlessly in the app, meets the requirement for easy configuration, but doesn’t include a WAF and creates a very long, random URL that is not ideal (this is part of their security model, which I don’t love).
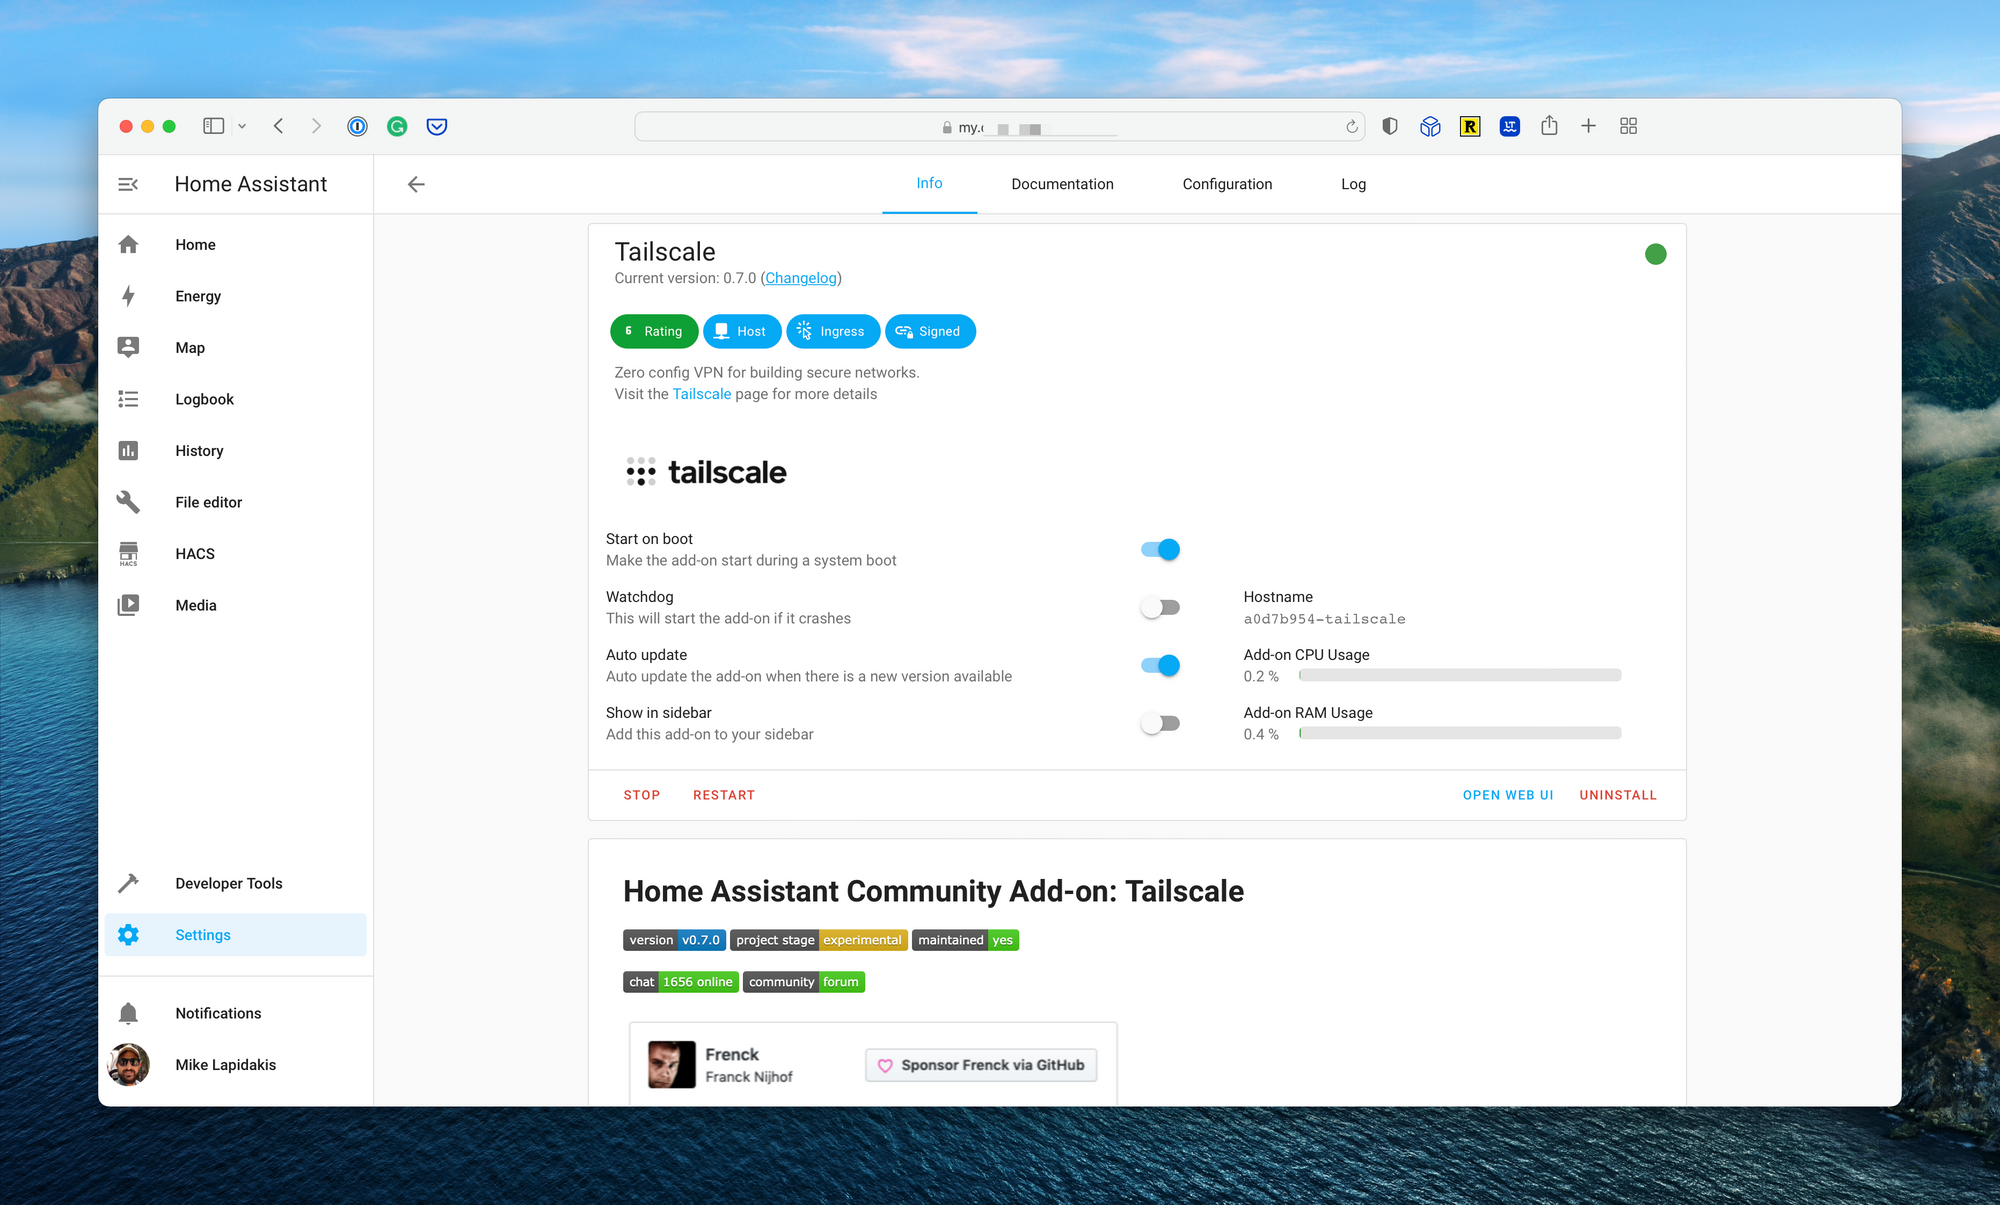
Next, I tested Tailscale, a WireGuard-based VPN that provides direct access to Home Assistant, with light device level configuration. There is an add-on for Home Assistant that allows for simple configuration. In testing, I found the client-side VPN connection unstable, dropping at times and causing inconsistent automation actions. It also requires the VPN to be installed on all devices which access the web interface, meaning I wasn’t able to access my Home Assistant setup from a work laptop, for example.
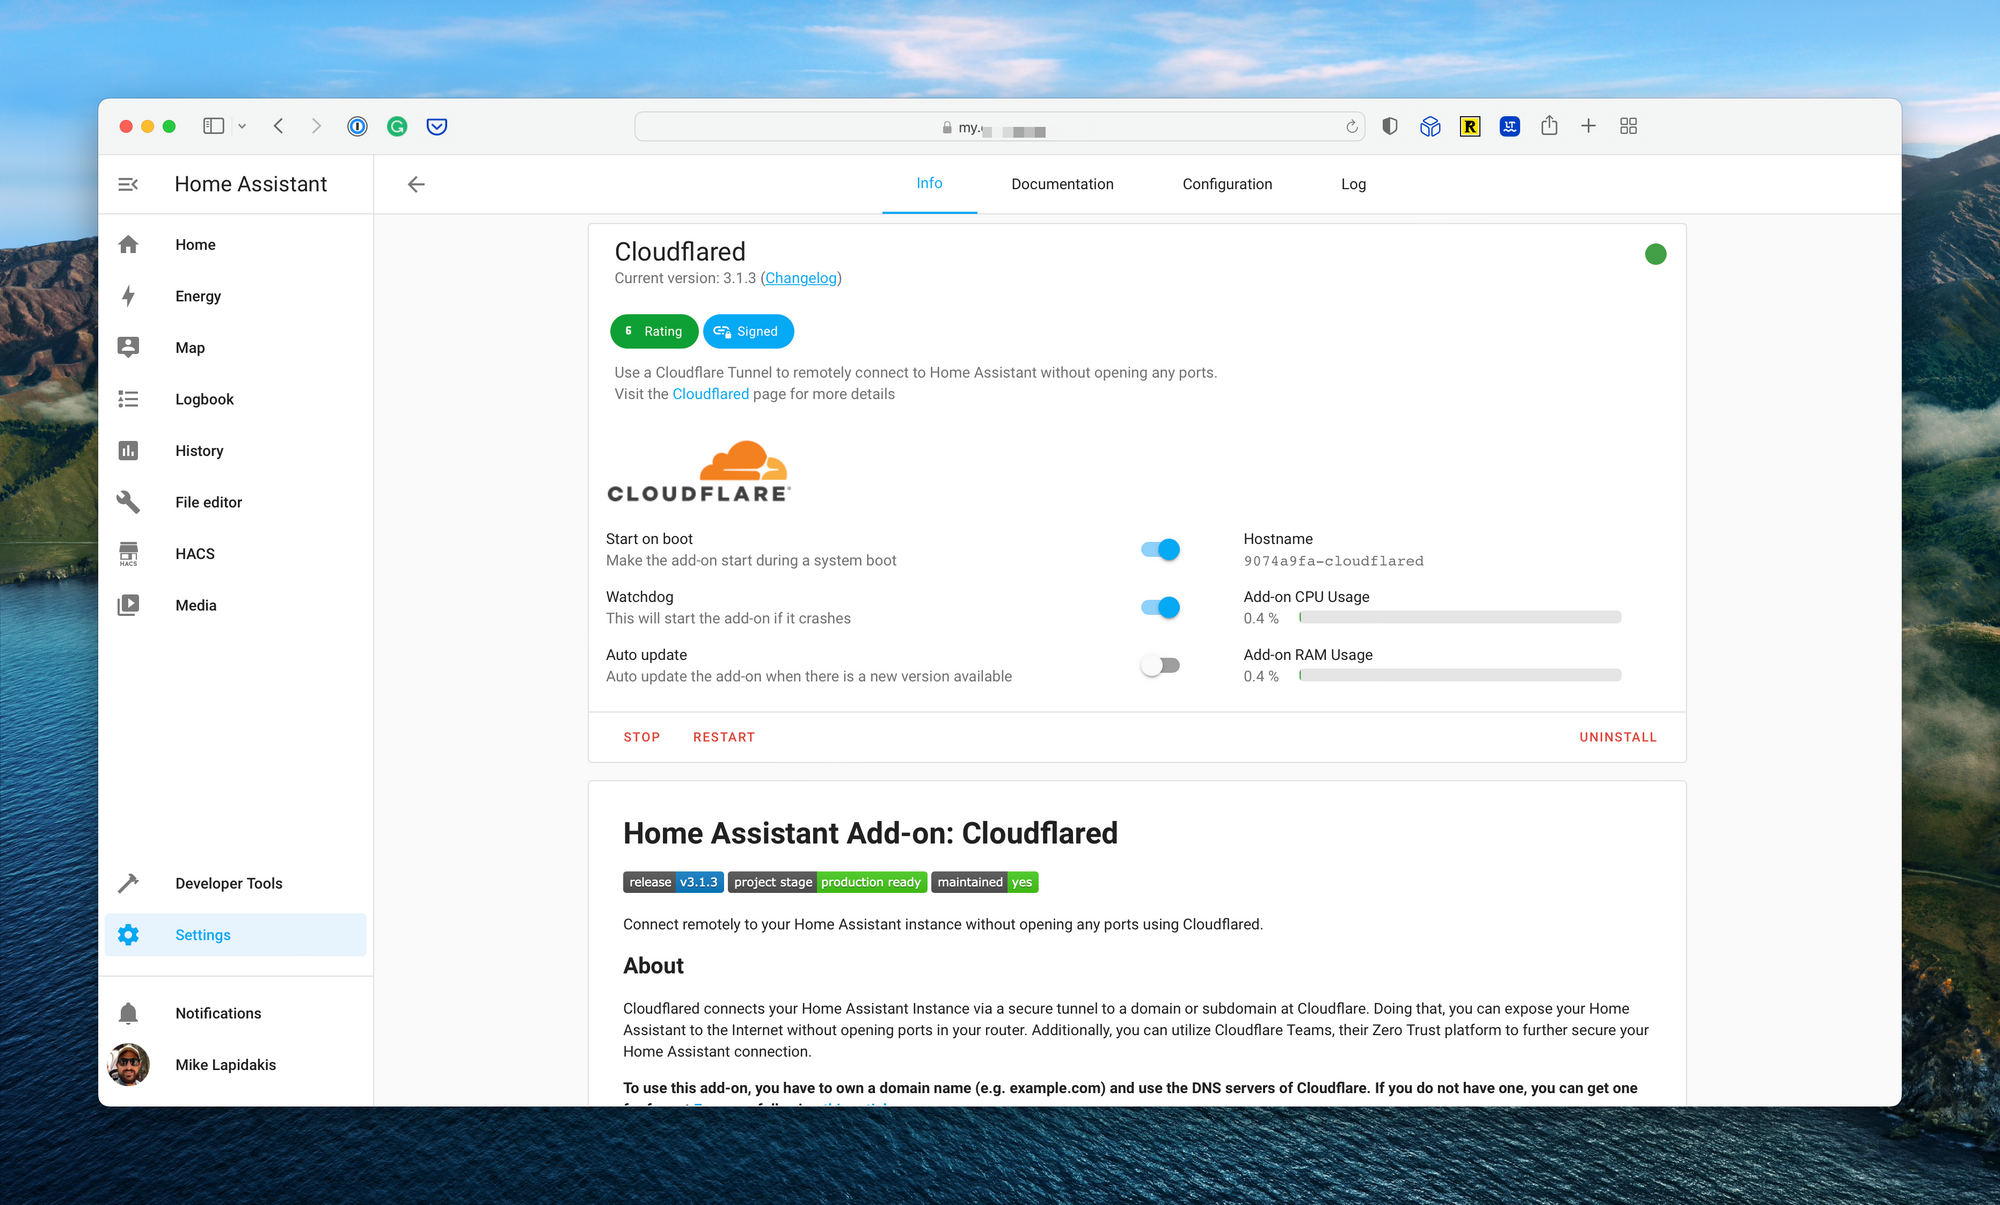
Finally, I tested Cloudflare Zero Trust. Again, an add-on exists for Home Assistant to configure Cloudflare directly from the home automation platform’s settings page. Cloudflare Zero Trust checked all the boxes above, and then some, and allowed me to use a domain hosted on Cloudflare to access the web interface. If required, I could take the security up a level by requiring all devices accessing the web interface use the Cloudflare WARP client; something I wouldn’t do initially due to the lack of DNS customizations from Cloudflare.
Configuring Cloudflare Zero Trust for Home Assistant
Cloudflare provides two key elements required to make this work. First, the ability to use Cloudflare as a DNS name server for hosting domain names you own. Second Cloudflare Zero Trust which allows the creation of tunnels to Cloudflare infrastructure, along with WAF capabilities and advanced authentication and authorization functionality.
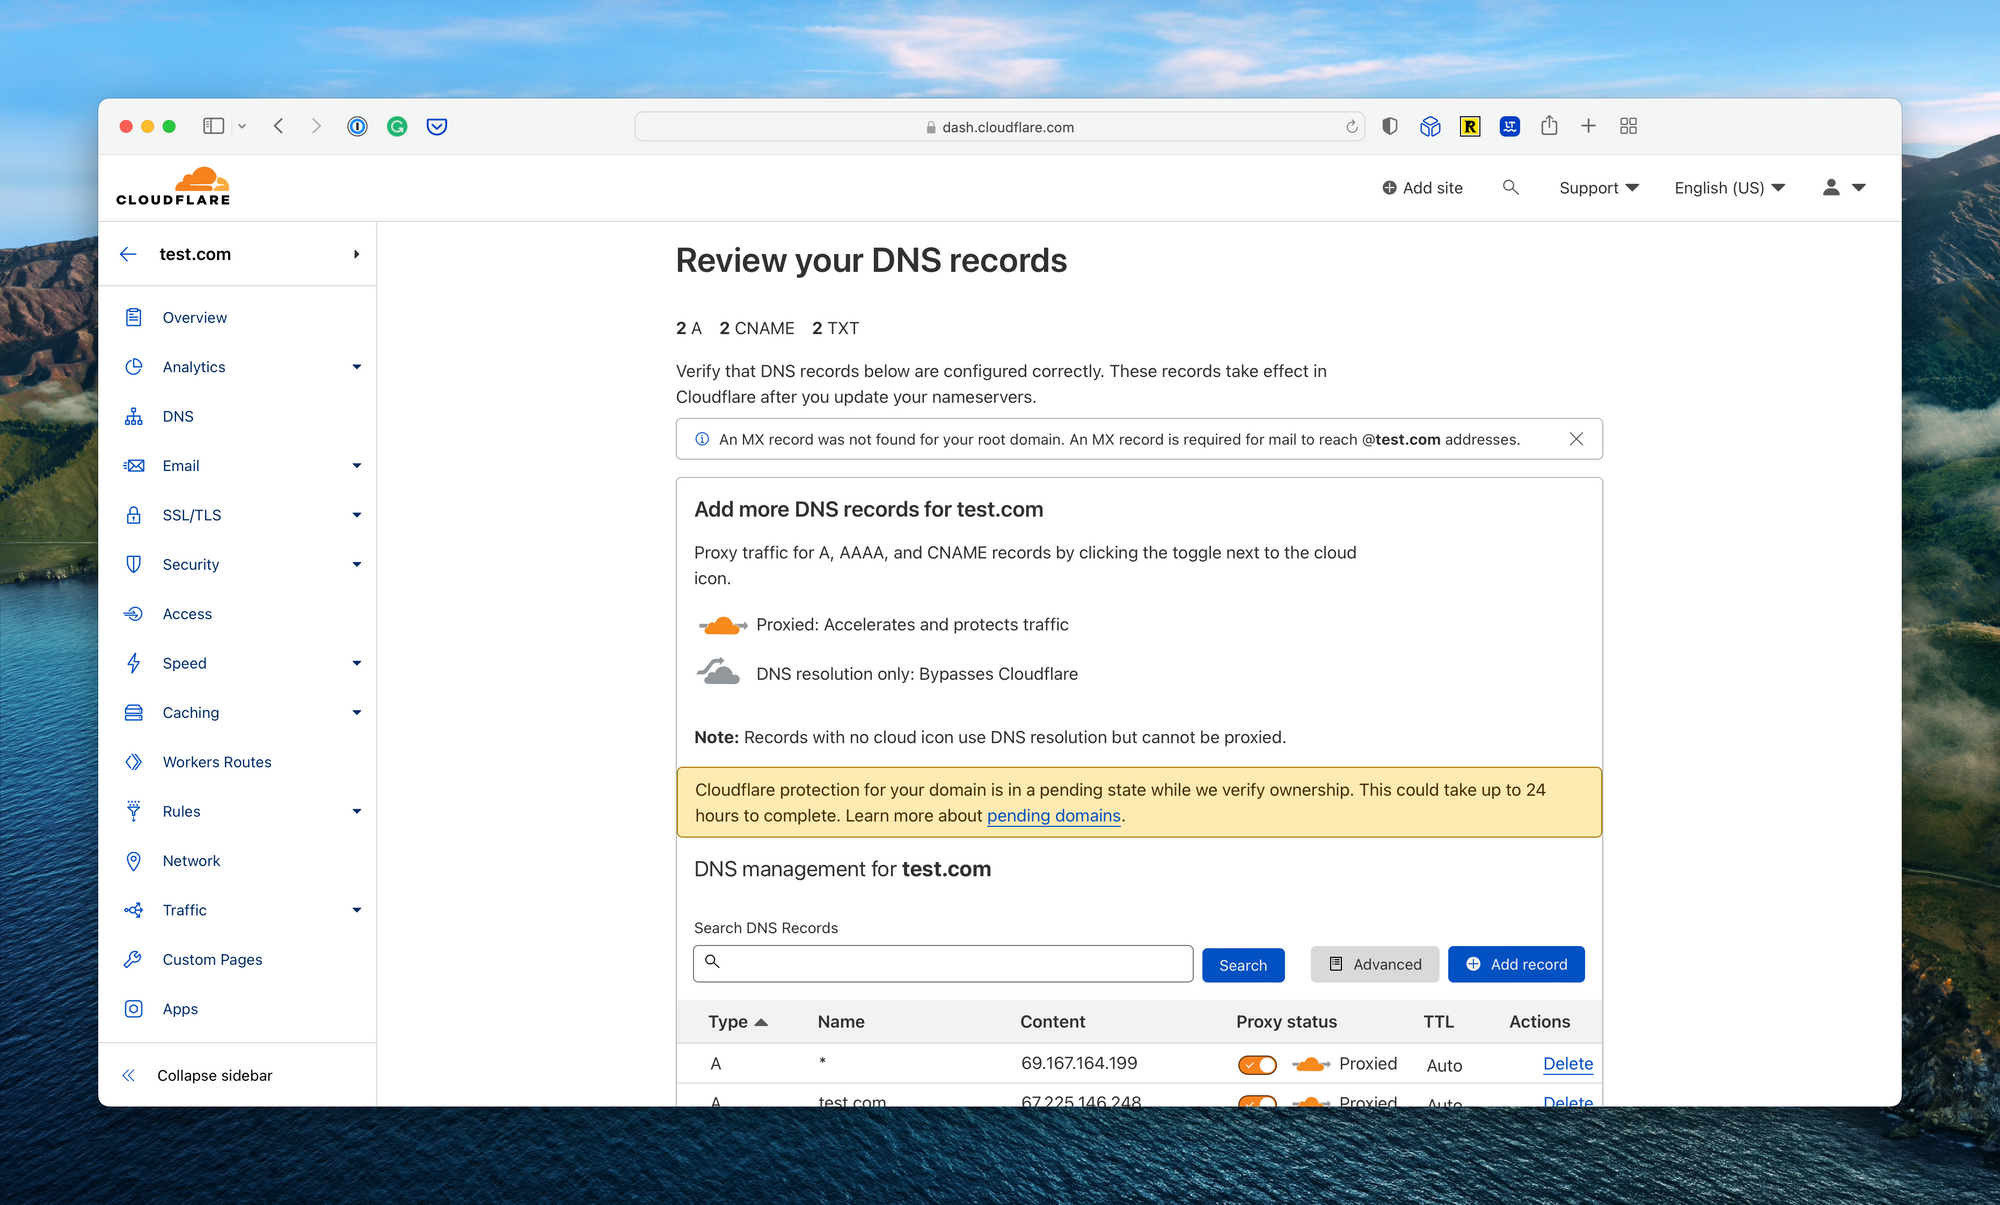
First, you’ll need to host a domain, or subdomain, on Cloudflare. You can use Cloudflare to purchase a domain if you don’t own one, or point the name servers of a domain purchased elsewhere to Cloudflare. This process is documented extensively on the Cloudflare documentation.
Next, you’ll need to install the Cloudflare add-on to Home Assistant. If you’re running Home Assistant OS on a Raspberry Pi or similar device, the installation, and configuration is a breeze. The add-on also has extensive documentation. I chose the remote tunnel option, which allows all configuration settings to be managed from the Cloudflare dashboard.
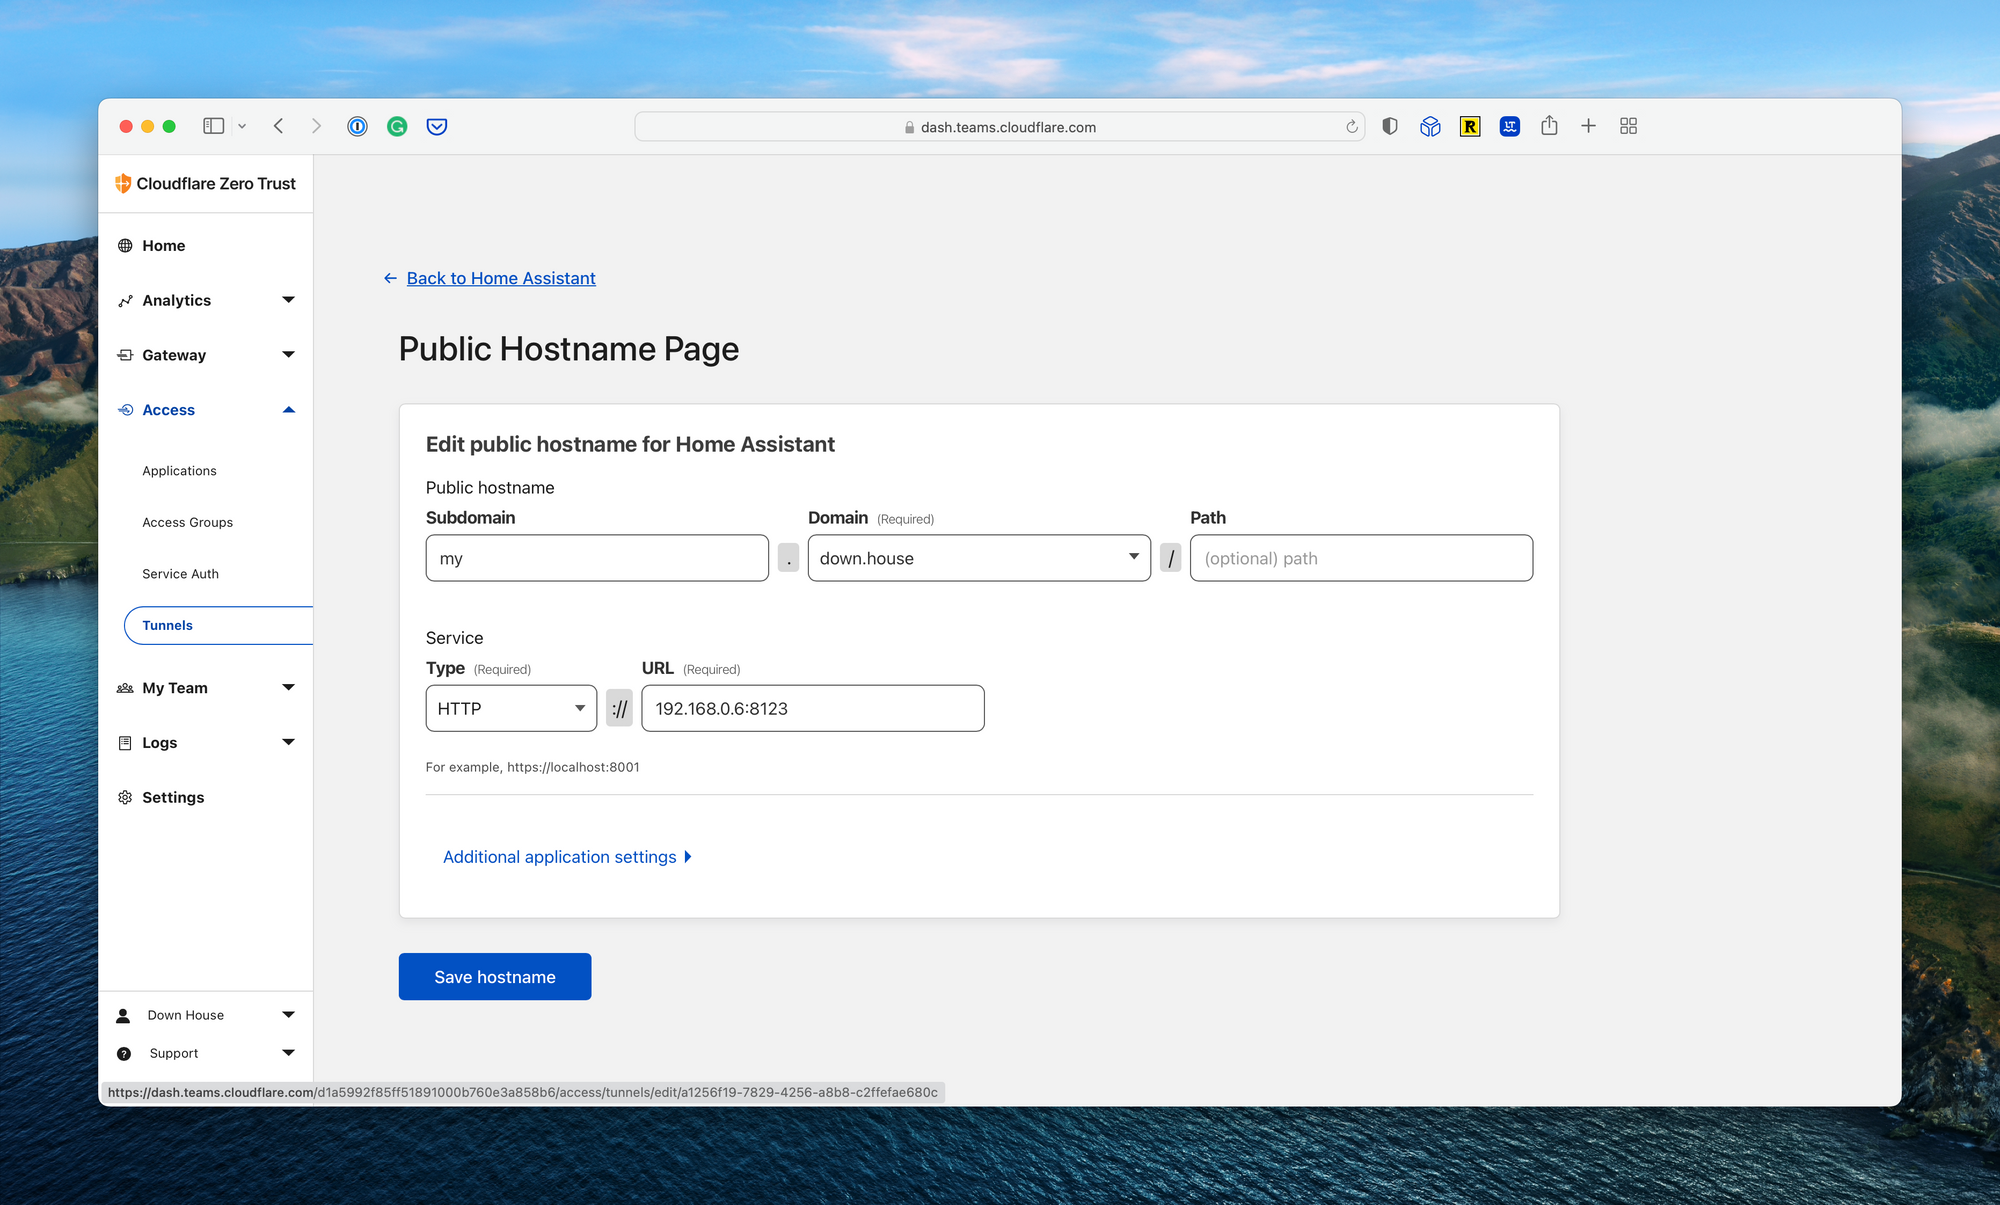
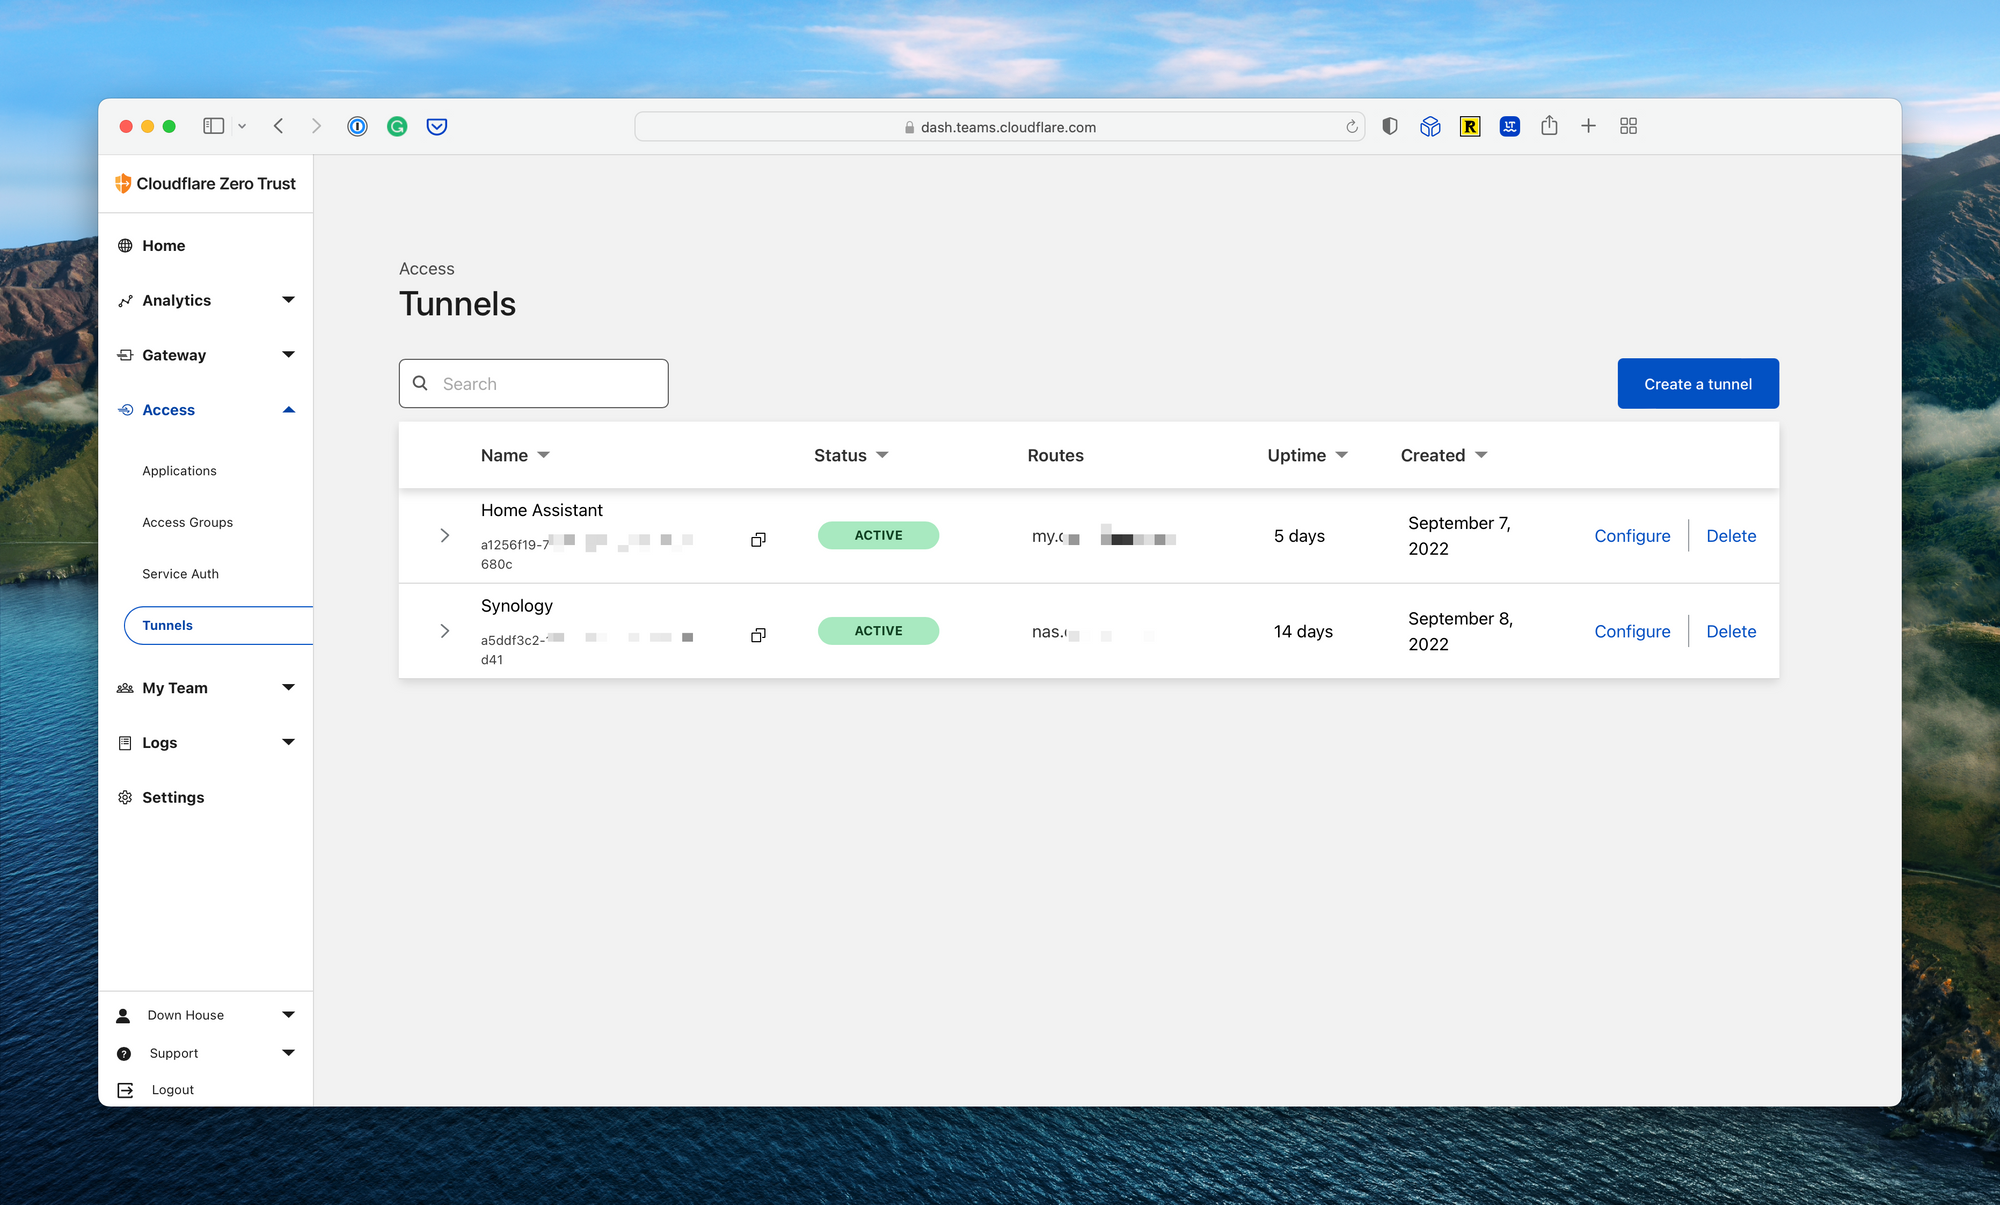
Finally, navigate to the Cloudflare Zero Trust console, select Access from the navigation bar, and select Tunnels. Here you’ll see the newly created Home Assistant tunnel. Click Configure, and click Public Hostname to set up the domain name. You’ll see a dropdown list with the available domain names. Select one, add a subdomain, and configure the local IP address for Home Assistant. In my case, this was http://192.168.0.6:8123. Now simply navigate to the domain name mapped to log into Home Assistant.
Optional Cloudflare Configuration
Enterprise platforms like Cloudflare have endless capabilities for securing web applications. While not required to get things working, there are a few interesting options that, depending on your risk profile and setup, you may want to consider.
Web Application Firewall Rules
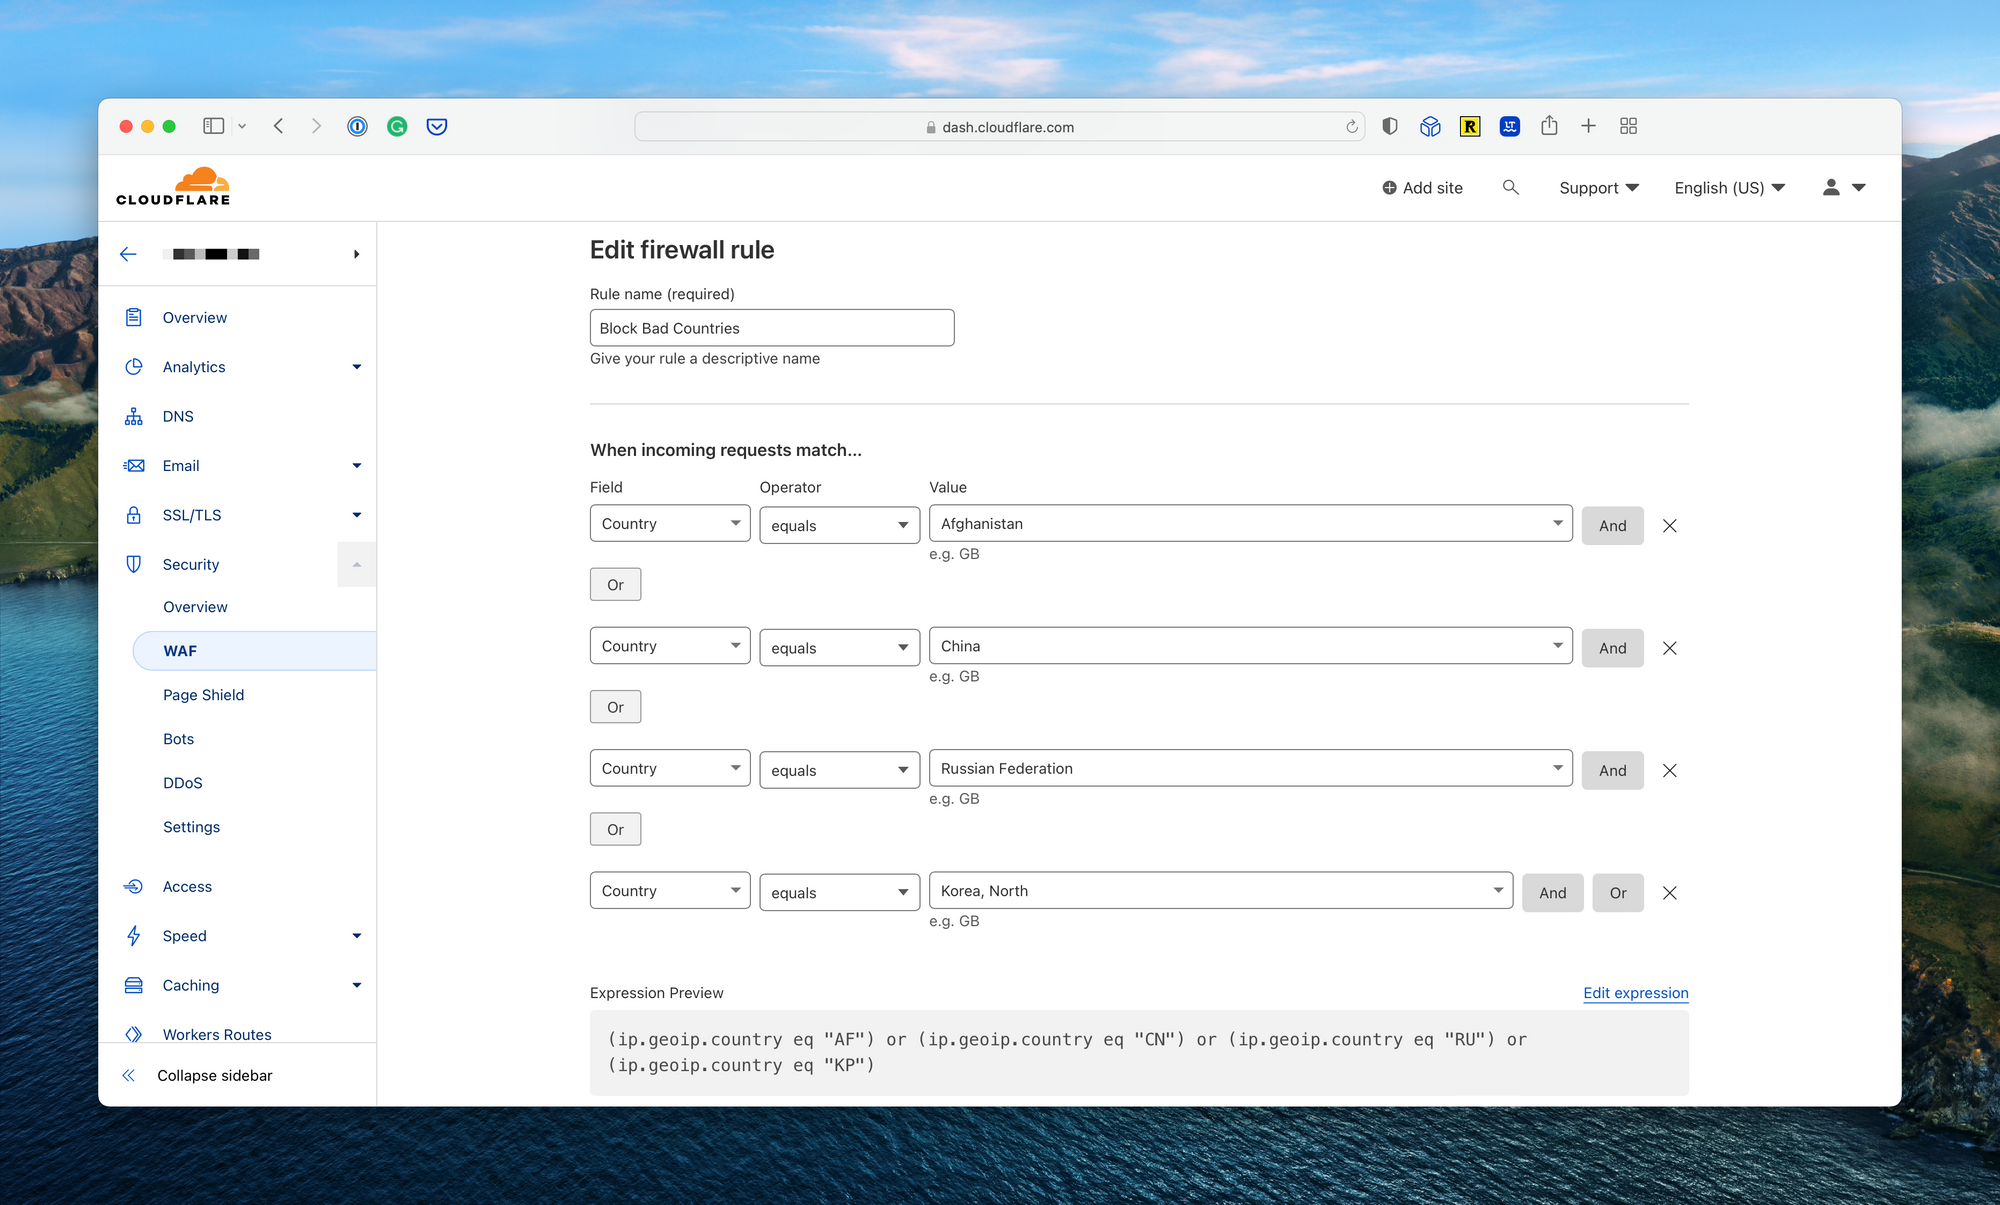
One requirement for me was the ability to block specific countries from attempting to log into my Home Assistant environment. I did this by navigating to the domain name from the main Cloudflare dashboard, expanding the security section, and selecting WAF. From there, I created a new WAF rule with a list of countries I would rather not have the ability to access my Home Assistant endpoint.
Advanced Zero Trust Login
Another option is the ability to add a secondary authentication and authorization prompt, managed by Cloudflare Zero Trust, to prevent an unauthorized party from leveraging a vulnerability in the login page to gain access to my Home Assistant setup. Admittedly, this is an unlikely scenario, and to date, I have not enabled this configuration beyond simple testing.
To set this up, start by creating an access group. Navigate to Access, then Access Groups in the Cloudflare Zero Trust dashboard and create a new group with all users which you’d like to have the ability to access the Home Assistant. Name the group and set this as the default.
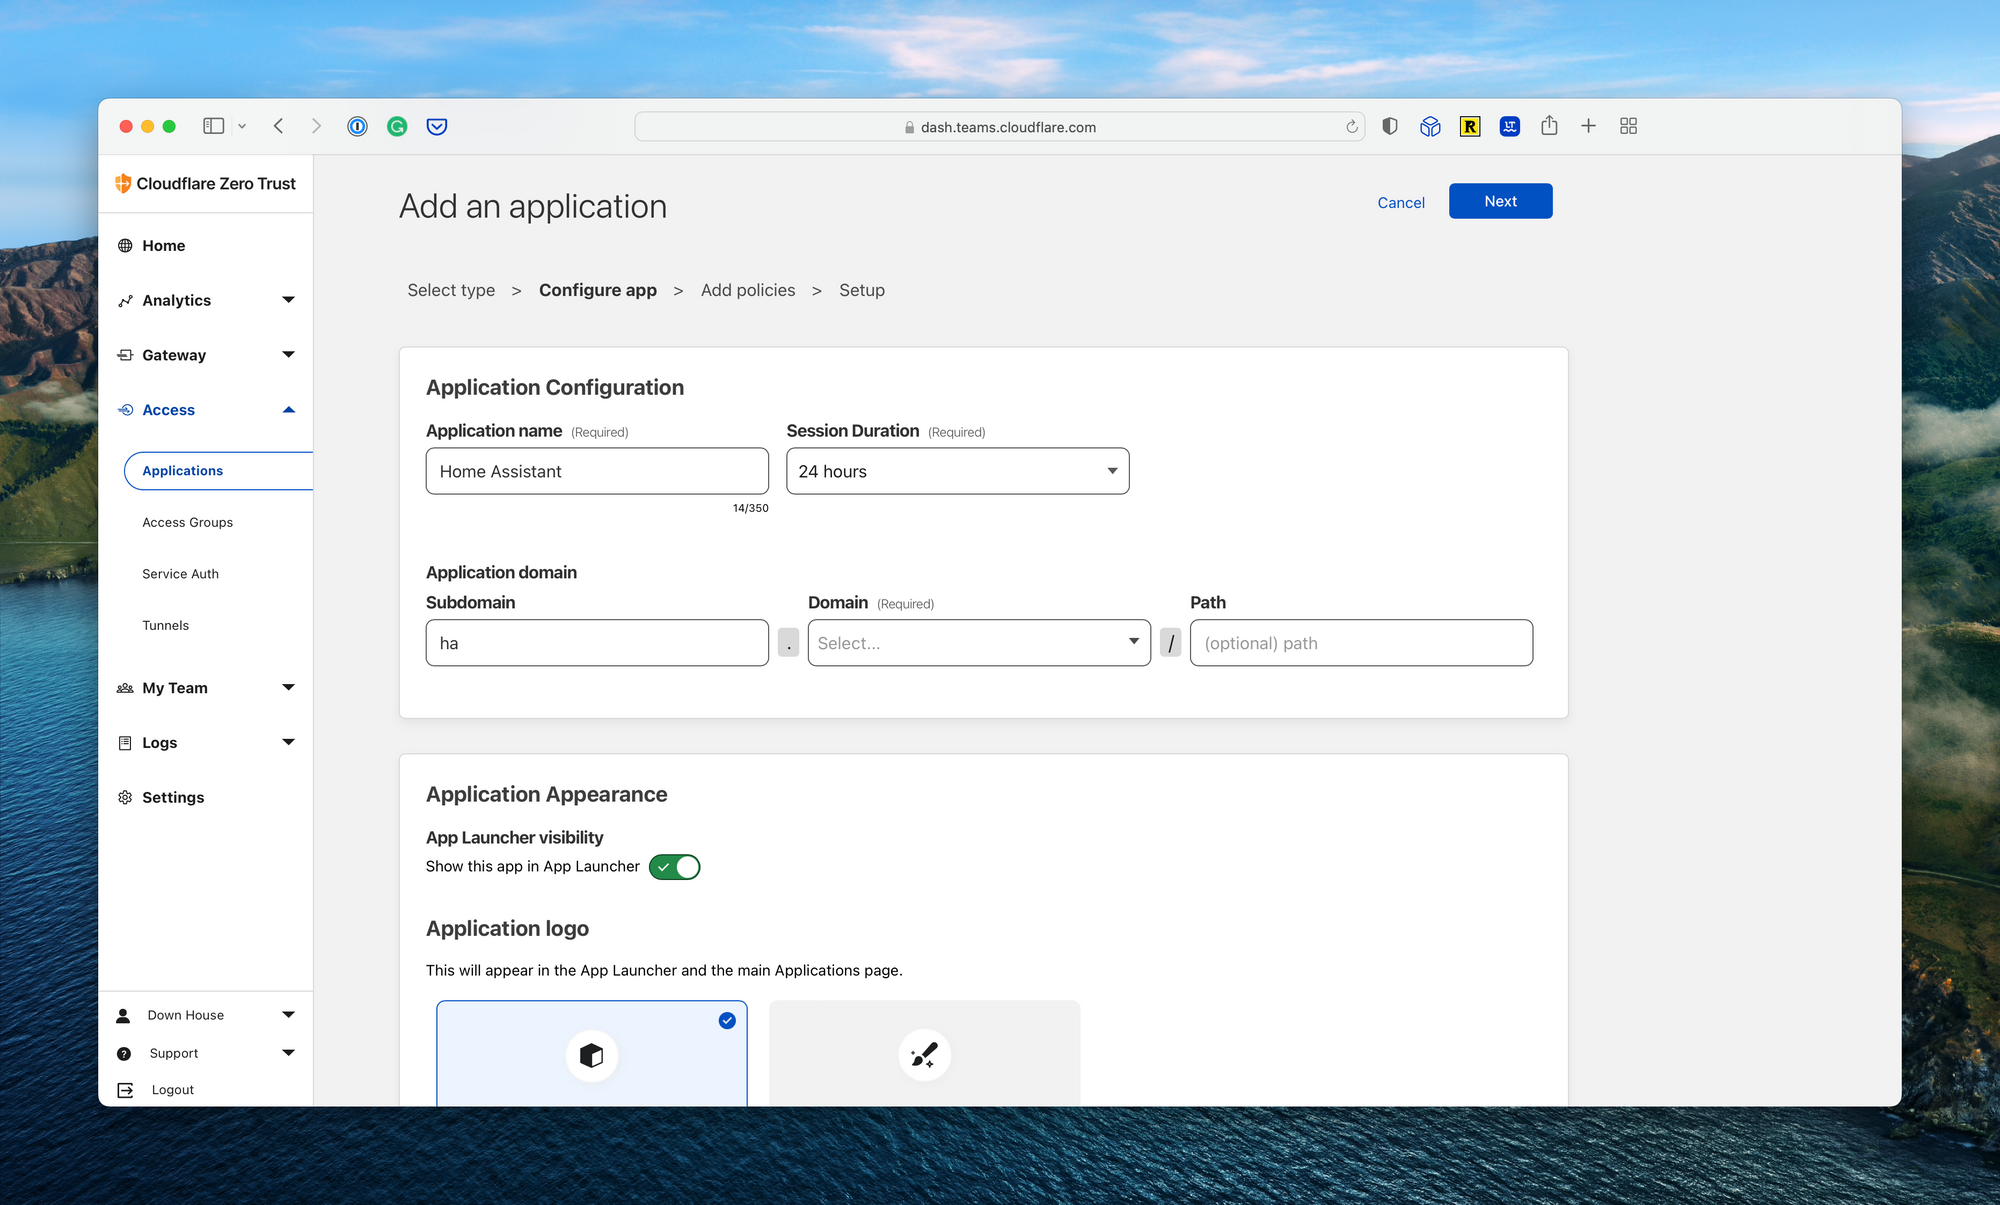
Next, navigate to the Applications page under Access. Select “Add an Application” and “Self-hosted” from the next screen. Fill in the name (i.e., Home Assistant) and the path to the application, which will be the same as the Tunnel configuration above. On the policies page, add a new allow policy and make sure the default group created above is assigned. Save the policy and complete the setup wizard.
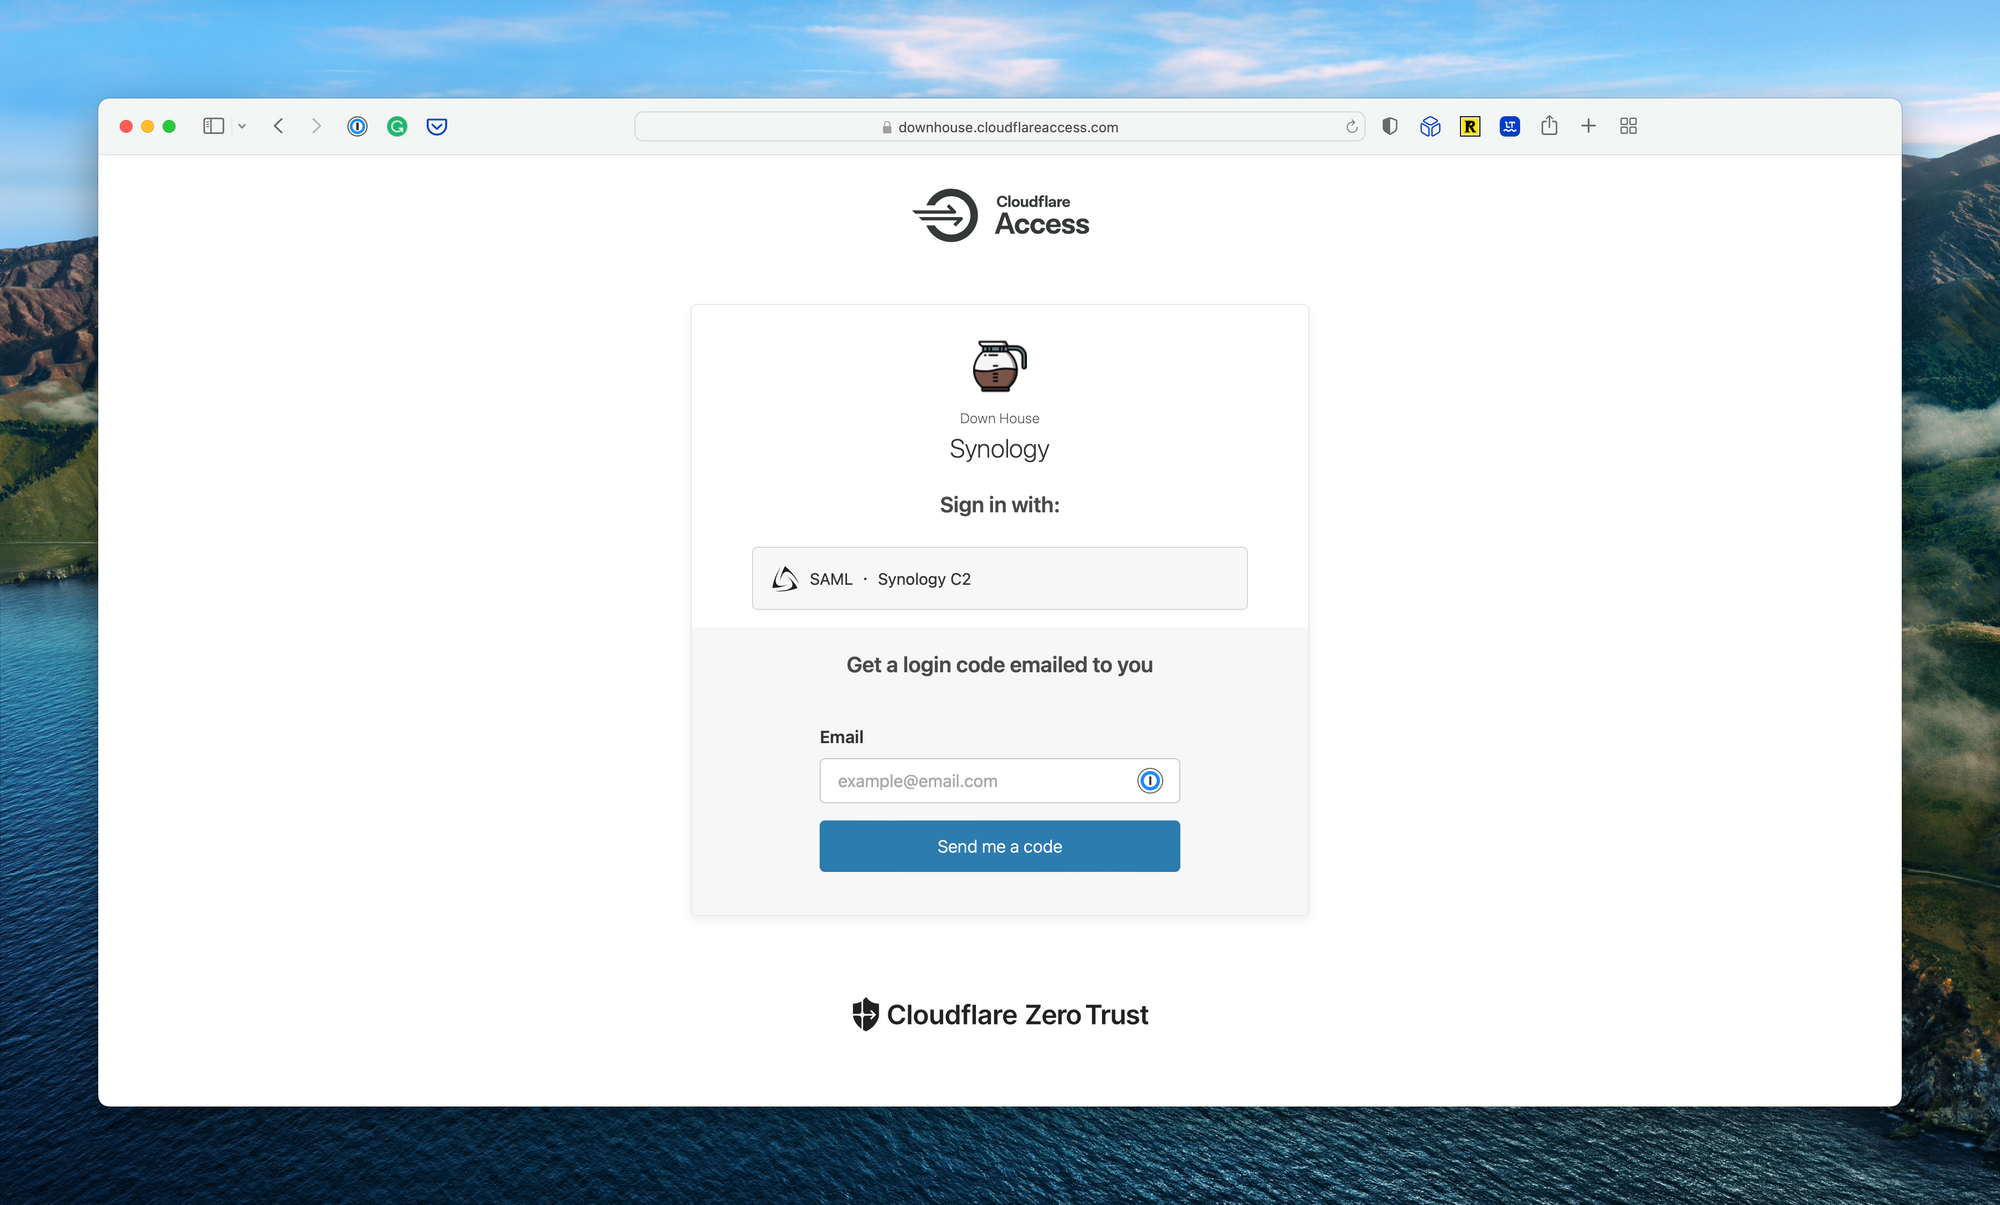
When done, navigate to the URL for your Home Assistant dashboard. You’ll be prompted to enter an email address associated with the Cloudflare Zero Trust environment. Enter your email, find the pin in your email inbox, paste the pin in the authentication page, and proceed.
For now, I’ve opted to bypass this additional layer of security. The Home Assistant iOS application does not allow for custom headers for injecting authentication tokens, meaning I would need to log in through the above pin to email process after a configurable timeout (max 30 days). Ideally, the Home Assistant iOS application will add the ability to inject headers into requests which will bypass this login prompt (more on this when/if the functionality is added to the iOS app).
Summary
Cloudflare Zero Trust allows Home Assistant to gain additional security functionality, speed, and ease of use for free. My home’s IP address is hidden, I’m able to block countries I will not log in from, and there are no additional ports exposed on my home network. While Cloudflare has a slight learning curve, configuration is straightforward and easy to maintain. Finally, the Cloudflare add-on for Home Assistant is actively maintained, receiving regular updates. I’ve found this setup to be more than adequate for my household.
If you have any additional questions, feel free to drop a comment below.


Comments ()